What are the QR Code Widget Properties
QR Code Widget
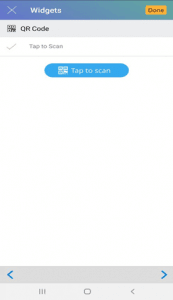
QR Code widget can be added to your workflow for allowing data capture through scanning of the QR Code. When you scan a particular QR Code, the information relating to that product/object can be fetched easily – without the user having to fill those details. To add QR Code to your workflow, just drag the widget from the left panel to the digital mobile screen in the middle.
QR Code Widget—Properties
Label
You can change the name of the ‘QR Code’ using a label. It is ‘QR Code’ by default. On the right panel, go to the label section and you can type the required text that you want. The same name will appear on the workflow.
For example—you can create a QR Code field for products and name it as ‘Electronic Equipment QR Code.
Required
You can use this property to make ‘QR Code’ mandatory to be filled. Some fields in your workflow might be mandatory, while some might not be.
For example, ‘QR Code’ can be set to ‘Yes’ in the required property when you want to make the field mandatory. So, while filling out a workflow, the user will have to compulsorily choose to fill the QR Code field, without which the workflow will not be submitted.
Unique Identifier
Every field will have a unique identifier. No two unique identifiers for fields will be the same. Please note that ‘Unique Identifier’ property is just for reference purpose only. The user need not have to do anything to this property, it can be referred when there are fields created with the same names. When you create two fields with the same names, it might get confusing when you are setting a condition and you wouldn’t know which field is which.
For example—If you have created a field ‘address’ – and set a visibility condition to it saying the ‘address’ field will be only visible if you have entered the ‘Phone number.’ But if there are two fields that say ‘Phone Number’ – it will be difficult to set a visibility condition since both the fields have the same name. Both of these fields ‘Phone Number’ will have different unique identifiers. You can check the unique identifier and then set the condition accordingly.
Visibility Conditions
Visibility Condition in the property for the ‘QR Code’ is used to specify a condition. If you apply any visibility condition, it implies that the ‘QR Code’ field will only be visible if it satisfies the condition that you have set. Visibility condition can be set by specifying the condition – you can do that by clicking ‘condition not specified.’
For example—you might create a field ‘Product QR Code Scan’ which will be only visible if the user chooses ‘Yes’ option in the earlier choice list ‘Are the Products available for the scan?’
Validity conditions
Validity Condition in the property for the ‘QR Code’ is used to specify a condition. If you set any validity condition, it implies that the ‘QR Code’ will only be valid if it satisfies the condition that you have set. Validity condition can be set by specifying the condition – you can do that by clicking ‘condition not specified.’
For example—you might create a field ‘Machine QR code’ which will be only valid if the user chooses ‘Machine’ in the earlier choice list from the workflow. Otherwise, it would be invalid and show an error message. Validations can help you control the type of input during the filling of a workflow by the user. You can also customize an error message that you want to display by typing the message in ‘Validity Error Message.’ This message will be displayed when the validity condition does not match with the given input.
The error message could be “This is only for Machine QR code.”