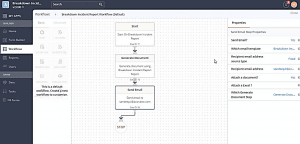
Step by Step Tutorial on How Action Designer Works
Custom Action
Custom Action allows you to customize the action associated with a workflow in your app. A custom action is used to modify the app and the functions it performs as per your own business requirements or use cases.
The process to Create a Custom Action
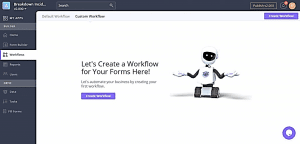
Step – 1: Go to the Actions section and click on the Custom Action tab to create a new action
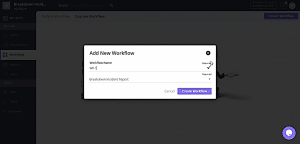
Step – 2: Select the particular workflow for the action and name the action
Please note that you can only create an action once you have created at least one workflow in the app using the Workflow Builder. An action cannot be created if you don’t have any workflow associated with it.
Step – 3: You are ready to design a customized action
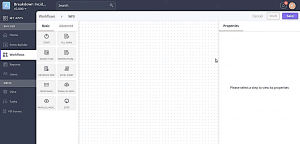
DataMyte Digital Clipboard actions designer allows users to design multi-step actions by dragging and dropping action steps onto a designer canvas (dotted space represented in the middle of the screenshot 3) and then connecting the steps together in a chronological sequence.
Step – 4: Assign specific properties to the different widgets used in creating the list of actions and save the actions
When the sequence of actions executes each step runs after the previous step is executed. Select basic or advanced widgets for your actions and assign each widget specific properties in the right-hand side panel of your action designer. Once you are done, click on the save tab and your customized actions becomes active.
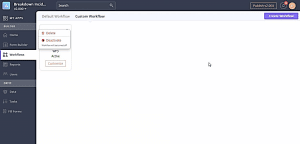
You can even deactivate your customized actions by clicking on the deactivate tab. This tab can be accessed by going to the list of customized actions displayed. Status of the actions are displayed as active or inactive. You can even delete an action by selecting the delete option displayed in screenshot 5 below.
Default Action
A default action is automatically created once a workflow has been created in the DataMyte Digital Clipboard Platform. The default action cannot be changed and to change it, a customized action needs to be created. A default action is displayed in the screenshot below and can be used to understand the process associated with a particular action by the execution of the specified tasks.
Basic Action Widgets
Start Widget
The start widget triggers the start of the action events, like in the case of an asset or an action workflow, the action starts when a new site is created with the asset workflow or when an inspection is performed on a site, which relates to an action workflow.
Stop Widget
The stop widget is used to end the action events after all the processes in it have been executed.
Advanced Action Widgets
Decision Widget
The decision widget is used to decide which path to go to based on a previous value entered in a workflow. For example, in a workflow documenting medical test information of a respondent, if the respondent indicates a positive response for a particular question, then a particular set of processes will be executed in the list of actions. If the response is negative, then another set of processes will be executed in the list of actions. The decision widget helps in determining which path needs to be chosen and a particular path is executed depending on the response recorded.
Call Rest API Widget
This widget is used for calling a third-party API; like some third-party systems provide export rest API, through which they access request from any other source and this request has a certain format, and data is received in this particular format and this data can be accessed and handled the way you want once you accept the request.
Using the Call Rest API, the DataMyte Digital Clipboard platform can route data collected through the forms directly to the data management system of their customers, like a CRM system. For example, if any customer is using our app for lead generation and they are capturing lead information from the forms created by the DataMyte Digital Clipboard platform, and they want the collected lead information to go directly to their CRM instead of using the DATAMYTE Digital Clipboard Drive, we can configure their API and the collected data will be sent directly to the system of their choice.
This is used mostly by established companies already having an existing system of data management, and they don’t want to shift to the DataMyte Digital Clipboard Drive, but just want a data collection tool. So, in this scenario, we ask them to provide their API for the purpose of integrating their app and they can get the data directly in their existing system. DataMyte Digital Clipboard uses standardized and globally recognized call rest API systems and this enables us to integrate with any third-party system.

